Sunday, November 6, 2016

DIY Small Raised Fairy Garden Bed

Fairy garden/forest, a year and a half later (see update at bottom of post)
We’ve built several large raised garden beds at our current house (and a guide on how to build one of these will be put up at some point in the future), mostly for our own fruit and vegetable crops. What we haven’t done, however, is create our own fairy garden… until recently.

This is a quick, simple, and generalised step-by-step guide with photos on how to create your own fairy garden amongst a proper (if a little small) raised garden bed containing a few useful plants. The intention is that this can be followed step-by-step as-is, or be used as a “jumping off point” for creating a raised fairy garden bed using (possibly vastly) different materials.

Choosing a Spot

Our chosen spot for the fairy garden.
We recently got a family of ducks and ducklings (this may seem unrelated, but bear with me, it had an impact on where we decided to put this new garden bed). While they’re still getting used to us, learning to trust us, they’re confined to their cage at night, and an outside fenced enclosure measuring about 10 sq. metres with a pond throughout the day. In future though, we’d like to let them be free-ranging on our property during the day.

A few of the items we put (and will be putting in future) in the fairy garden are fragile, and if the ducks wandered through this garden bed on their search for tasty snails and insects, they may accidentally break some of the items.

Of course, they may decide the vegetables in our vegie gardens are too good to pass up, too. As such, we already have plans to fence off the area around the vegie garden before letting the ducks roam free. Due to this, we decided to put the new garden bed in the area which will eventually become fenced-off, and hence become safe from webbed feet.

After this decision, we still had to decide where to place the new garden bed in the area which would become fenced off. We ended up deciding that the garden bed can sit against an old wattle tree to act as its fourth wall, and for added ambiance.

To generalise, choosing a spot should be a matter of finding somewhere not too far from the house (so you can enjoy it easily), and if applicable, somewhere pets are unlikely to find themselves amongst the garden bed if there are fragile items being used for decoration.

What You'll Need

As mentioned at the beginning of this guide, this is intended to be a general guide, including a broad method for how we created our particular garden bed. So I won’t be giving exact numbers and measurements, just the materials you’ll need in general, and the materials we used as a guide.
  • Walls. We used old wooden planks from around the property. You can do the same, or find something else to use. Logs, bricks, or even buy some simple untreated planks from your local hardware store if there’s nothing you can use for free.
  • Something to hold the walls up. If you’re using thicker materials such as logs or bricks which hold themselves up when under pressure, this may not be necessary. However as we used planks, we used “star-steels” (a.k.a. “star-steel pickets”) to hold the walls up, both for their structural stability, and re-usability over a long time period. You could just as easily use simple wooden stakes, rocks, or anything else to hold the walls up, as long as it’s stable and safe once it’s all put together.
  • Soil. As this is going to be a home for living plants (not just the fairy garden decorations), there needs to be something for the plants to live in. You can usually use soil from elsewhere in the garden, but since we live in an area of very poor soil, we had to buy bags of soil from a local Bunnings.
  • Plants. We used Lawn Chamomile (a medicinal ground cover no taller than 10cm's, which smells faintly of apple), Wooly Thyme (a ground cover and culinary herb, which is also anti-microbial, and useful as a highly-effective gargle), and Yarrow (a wound-healing herb, which also attracts bees). They are all medicinal in their own ways, and all edible.
  • Fairy-themed decorations. Doors, stepping stones, mushrooms/toadstools, whatever you want as decorations. Have fun with this dot point in particular – after all, isn't that the point?
In terms of the plants chosen, you could pick plants which would just look good amongst fairy-themed decorations, plants which are purely functional, or possibly plants you haven’t had room to plant elsewhere. The only advice I might give is to make sure the plants you choose aren’t poisonous, as fairy gardens are a natural place for inquisitive little toddlers to gravitate towards. So safe (perhaps even edible and tasty) plants are a good place to start.

Having a general design in mind before you go out to find your materials may be wise, but that’s not to say that you can’t “wing” the design as you go. If you end up with a rather eclectic design due to no prior planning, there’s nothing inherently wrong with that as long as it all holds together in the end.

Putting it all together

You’ve chosen your spot, you’ve got your materials, and you have some semblance of an idea of how you’d like it all to look at the end. Now comes the fun part: the assembly.

Wherever your chosen location is, the first step is to put up the walls. How the walls go together depends largely on the materials you’ve chosen your walls to be made out of.

Since we used old slats and star-steels, we placed the slats on top of each other and used the star-steels to keep them upright. Note that the star-steels only need to be placed on the outside of the walls – this is because the walls will be held up from the inside by the soil, once it’s been added.

If there are any large holes in the wall, they will need blocking. Small holes aren’t often an issue as once the soil has settled it won’t escape very easily, but large holes have the potential to disrupt the soil and let it escape, especially after a heavy rain.

Whether or not you’ll have big holes in your wall depends largely on the location and materials used for the walls. We chose to place the raised garden against the old wattle because it can act as a fourth wall, and adds an ambiance to the garden bed which would be hard to replicate without it. But its twisted shape at ground level did mean we had to fill in a couple of big holes before continuing to the next step.

Once the walls are up, the next step is simple: Fill the bed with soil.
Whatever greenery you’ve chosen, now’s the time to plant them. While doing so, keep your design in mind so that you’re not displacing where the various fairy decorations were planned to end up.
Place your various fairy decorations in their intended locations.

If you don’t have all the decorations you’d ultimately like, don’t fret, neither do we. We’re planning lots more decorations to go in, and you too can add more decorations to your heart’s content in future. For now however, just place what you have.
You have now completed your own small raised fairy garden bed. Congratulations!

Design changes, and personal touches

This is a very simple design which lends itself nicely to alterations. I’ve aimed this design and these instructions at demonstrating how simple it can be, but fairy gardens are (and in my opinion, should be) highly personal, and/or collaborative with anyone else you’re creating it with. So if you’d prefer to use different materials for the structure, plant different greenery, change the locations or type of decorations, or even just decide to create a much bigger and grander fairy garden bed, go for it!

As for us, in future we’re planning on adding more decorations including (but not limited to) long benches for the table. From there, we’ll add more stepping stones leading to a fairy ring of mushrooms to help complete the current design. Possibly we’ll add stone creatures, possibly we may add other plants in the ground surrounding the bed, who knows?

I’ll try to add another photo at the end of this article, once the coming winter has passed and spring has arrived, to show any progress the plants in the fairy garden have made (not to mention display any additional decorations).

However you go about creating your own raised fairy garden bed, I wish you luck, and I hope you have fun creating it.

(Originally published, by me, on Hubpages.com - 04/04/2015)


Update - 6th November, 2016

Well, it's been about a year and a half, and boy there's been some changes!

Unfortunately, we lost the Wooly Thyme when we were trusting a friend to water our garden for us in summer last year (mentioned in more detail in my Yule over Christmas post), but the Yarrow and Lawn Chamomile managed to survive, and have completely taken off since then.

See the following pictures (and captions) for yourself. We're actually now planning to have the fairy garden path go straight into the yarrow and chamomile, similar to a hidden path off into the forest.

Imagine searching through those plants and finding a hidden fairy path, complete with hidden fairy decorations. I don't know about you, but that sounds pretty appealing to me.

Fairy Forest - front view
Fairy Forest - top view
Lawn Chamomile up close
Yarrow up close
Fairy Forest

Wednesday, October 26, 2016

Why we chose Yule over Christmas

Our family has made a tough decision: in the future, we want to be as self-sufficient as we can. Completely, if possible.

This wasn't just a tough decision due to the responsibility that comes with managing a property with enough food and resources to feed, clothe, and house a family. But, due to us living in the southern hemisphere, there was an unexpected decision which needed serious consideration:
  1. Continue with seeing family and celebrating Christmas in Summer, or
  2. Move our celebrations to Yule. Which, in the southern hemisphere, is (of course) in Winter.

Why not just continue celebrating Christmas?

Our plans for self-sufficiency include keeping our own crops, livestock, even horses eventually. In summer, all of these will require multiple-times-daily attention.
Our three geese, when they were young.

If we're away, and our irrigation systems fail, there go our crops. If we get someone to water them, and they forget, there go our crops (which over the past four trips where we currently are, we've had happen twice).

As for the animals, same deal. We don't really trust any automated system to keep our animals alive for longer than a couple days, so we rely on friends to help out, and we pay them if we can't otherwise repay the favour. But what if that person then has a pressing engagement which means they can no longer look after the animals anymore, leaving us to scramble to find someone else, or cut our trip short and come home ourselves (which over the past four trips, we've had happen three times)?
Our geese a month later.
Just a few of our animals needing
our attention.

Maybe we've just had a string of bad luck. Hey, given how often something's gone wrong just for us stepping outside our door for longer than a couple days, it's highly likely. But short of hiring a professional, we've basically stopped trusting people to help out. Because while it's been relatively easy to deal with any of these issues while we're not relying on our harvests, the story would be very different in the future, when we are.

So then, can we really risk it? The idea of being away for a couple of weeks to visit family during Christmas, the same weeks that anyone we get or pay to look after the property will also be distracted by their own festivities?

But what else can you do?

To be honest, at first, there doesn't seem like much of a choice. It's Christmas, there's no option but to go, right?

Hauling a Yule Log (source: Wikipedia)
Yule, the pagan celebration on which Christmas is originally based on, occurs on December 21/22, depending on the year... in the northern hemisphere. For us in the southern hemisphere, however, it occurs in June. All the problems with leaving home during Summer I discussed above are practically non-existent at that time of year.

Trees and crops are either sleeping or not planted yet, with watering sorted in the form of Winter rains. Animals also aren't at any risk of overheating. Long trips away still require organising for someone to check on the animals, but it could be every second day, just to make sure they haven't tipped over their water containers and such.

And when Christmas rolls around, the time of year in the southern hemisphere where crops and animals really need the most attention, we'll actually be around to give that attention to them, personally.

How it's going to work for us

Here's the plan.

In the two to four weeks around Yule (depending on each year), we'll still need someone we trust in the community to look after our property, coming around a few times a week to refill food and water containers, and generally check that everything's okay. If possible, it can be a quid-pro-quo situation, where if they do it for us, we'll do it for them for Christmas. Otherwise, we'll have to pay someone, but as it doesn't require visiting multiple times each day, it won't be anywhere near as expensive.

During these weeks, we visit each of our family's. If possible, we organise a get-together at someone's house and hang out for a week or more together. If not, we spend at least a few days at each family member's house to see them personally.

If they still have work, we still visit, accept that they'll be away during the day (maybe go see a local site or two), and help out each night so that we can enjoy the company of each other. Snuggle in against the cold weather with hot drinks and good cheer.

On the night of Yule itself, whoever we're with can take part in some traditional Yule celebrations with us, if they feel like it.

Basically, we see everyone in our family, personally, over an extended time. And, when Summer rolls around, we're home to look after our land and animals. Exactly as it should be during the hottest time of the year.

The downsides of this tact

If there are indeed any readers out there in the southern hemisphere who have been plagued with this issue before, and are wondering if this idea will work for you, be warned: there are many downsides to this idea.

All of them, at least, are purely social.

1) Expect family members to be extremely confused.

We sent out a mass-email to family members on both sides once we were fully committed to this idea. We explained everything in careful detail, noting the why's and how's, including the fact that we would see everyone each year still, but around the middle of the year for our Yule instead.

It was almost a week before we got our first reply. After that, the replies slowly rolled in from each person, varying wildly from (paraphrased) "Cool idea", to "Oh, well, at least it's okay if we still get to see you all once a year". So, about as good as we could hope for, but it was obvious that, even without asking us further questions, there was a lot of "I still don't understand why they can't just keep doing Christmas" going around.

2) Expect family members to be pretty darn annoyed.

Christmas is, after all, a time for family to get together. So in the family member's eyes, it doesn't matter if you want to spend over a week with them every year to celebrate Yule if it's at the wrong time of year. Well, as far as they're concerned.

Until it becomes a regular occurrence (most likely after many, many years of doing this), expect this to continue. For some family members, possibly indefinitely. Spend as much time with your family over your holiday Yule period as possible, but otherwise, there's really not much to be done about this if you're truly committed to the idea.

It's also good to note that not everyone will be like this, of course. There can be just as many family members who, while they may not still fully grasp or agree with the concepts of why, will at least understand that it's not a decision you made lightly, and will support you.

3) Gift giving becomes a little trickier.
Hand-knitted socks, by my wife, for me, for Yule.

We now give our presents at Yule. We're celebrating at Yule, so it makes sense to give any presents to our family members around Yule as well. This does lend itself to a little confusion, though...

At least in this first year, where I don't know if any of our family members took our decision seriously, everyone was pleasantly surprised with, and very thankful for, our gifts. But as most of our family seems to be forgetting about our Yule idea, will they be expecting more gifts at Christmas time? Not wanting to give gifts because they're not going to get any at Christmas? Simply still giving gifts at Christmas, but with the potential to be a little disappointed because they're not getting one back (forgetting they already got a gift six months earlier)?

This con of the idea is tricky, with just as many chances of hurt feelings as the first two cons. It isn't at all insurmountable, though, it's just another point to keep in mind. If there are years where, due to hard feelings or simply confusion, you don’t get a gift back, don’t sweat it, and keep giving your Yule gifts each year. After all, the gift for you should be in the giving, not the receiving, right?

Other unexpected benefits

There are, at least, a few other unexpected benefits of this idea.

1) Travel during your holiday period is a lot cheaper.

If you can just drive over to see your family, this point may not apply. But if you have to book accommodation, flights, or anything else really, then it definitely does.

School holidays are usually anywhere between mid-June to late-July, depending on the state you live in. So if you plan your trips around Yule in mid-to-late June, the first half of your trip will be in the off-season for holidays. Depending on your state, the second half may be, too. A lot of money can be saved because of this.

2) Getting time off work may be easier.

Over Christmas, everyone wants time off work. Over Yule, not so much. As such, at worst, it will be just as hard to get time off. But at best, almost no one else is asking for time off, so it won't be difficult to get your Yule time off approved.

3) No more having to share a single day.

Whichever house we're at, we'll have our Yule traditions on the night of Yule (obviously). Other than that, though, we're not placing any particular importance on any single day or night. Rather, we're concentrating on getting to see everyone for a minimum of at least a few days (preferably around a week or more) for some good holiday cheer.

Compare and contrast with Christmas in its current form. If both sides of your family live close, many people spend Christmas traveling between family members, never spending the supposedly special day with any particular person for more than a few hours. Others, especially those where their respective family members live far apart, have to sort out a schedule along the lines of "We'll spend Christmas with you, but New Years with them, and then swap year after year". Both of these options have the potential to create hurt feelings, unfortunate ideas of "Why can't you stay longer with us though", or "Why can't you keep spending Christmas with us and just be with them for New Years each year?"

Granted, we're potentially creating even more hurt feelings with our way of doing things. But at least we're skipping all of this.

Overall

Mudgee, our sheep, when she was just a
few days old.
Yet another animal who'll appreciate us being
home for summer.
We're trying to do what's best, what makes the most sense from a self-sufficient and ecologically-sound point of view. If we want to live self-sufficiently, that just won't be possible if we decide to leave our animals and crops for a fortnight or longer during the hottest part of the year. It just doesn't make sense.

The fact that we're not having Christmas anymore is mostly just an unintended casualty of the idea. It's not that we don't want to see our family anymore, but moreso that we'd prefer to see them when it actually makes sense: in the colder time of the year, when the land needs very little attendance.

If we're lucky, our family and friends may still not agree, but will at least understand in time. If not, we'll still sleep soundly knowing that we're sticking with our principles, and doing what we believe is right. In the end, that's a very comforting thing to hold onto.

Thursday, February 4, 2016

Sketching - My New Endeavour, and What It Can Do for your Mental Health

Drawn by me in a day, now used as my online avatar.

“The whole culture is telling you to hurry, while the art tells you to take your time. Always listen to the art.” - Junot Diaz
At 23 years old, and after a life devoid of creating any art since year 7 and 8 art classes (unless you count a few pieces of music I’ve created here and there), it took a little nudging from my supportive partner to give it a go.

Once I overcame that hurdle, though, I quickly discovered a new passion.

Within this article is both an account of how I got started, what it felt like to push past that mental block and finish my first sketch in oh-so-long, and the beneficial health effects of sketching (including better memory, concentration, and a generally healthier and more efficient brain).

Starting can be the hardest part

For most of my life, I haven’t drawn purely for art. This is largely due to my attempts to draw for art early on in my life and, well, sucking at it. I stank so much at drawing despite my efforts, it had an effect on my self-confidence for almost anything visual-art related. Because of this, except when I had to do art in my early college (or “high school”) years, I simply stopped creating physical or drawn art.

Unknowingly, it swiftly became a mental block. I truly didn’t even realise it was there, until just under a month ago when my partner drew my face, and then asked if I could draw her.

I froze.

I wanted to, to re-pay the favour. And I knew she wouldn’t care if it was terrible, because it was the thought that mattered in the act for her. But I could barely move – my breathing even became shallower. The reaction of mine felt weird and overly strong at the time and in retrospect. But how strange it was didn’t make it any easier to push past.

We both knew what was happening, though. And faces are hard to draw until you know what you’re doing, so we just settled on me drawing her back (from shoulders down to the hips), a much easier target to draw for a novice. We got all settled in, I took a good few minutes before I even let the pencil touch the page… and then it began. After I started, I enjoyed it immensely, and after drawing her back, I went on to drawing her crossed arms and hands, before moving on to drawing from nature (once I’m confident, I’ll have a go at sketching her face to pay her back in full). But for me to have broken through that mental block, it needed a lot of patience, and gentle coaxing. Having someone who knew me as well as I knew myself to help me through this definitely helped.

It’s funny, really, the strange mental blocks we can place on ourselves sometimes. For me, it was creating any kind of physical art, drawn or moulded or otherwise brought into this world to be enjoyed by being seen. But in case anyone’s in this same position that I was in, I urge you to just try. Start with something very simple, and take it as slowly as you need to. You might just find you enjoy it after all, as I did, regardless of the end result.

One of my first sketches, a two-dimensional tree drawn purely from the mind's eye. Like most first sketches, it’s nothing to write home about, but it was very fun to create.

“Always dream and shoot higher than you know you can do. Don’t bother just to be better than your contemporaries or predecessors. Try to be better than yourself.” ~William Faulkner

Health Benefits of Sketching

Sketching (and creating art in general) can come with a slew of mental health benefits. Not inconsequential either, but benefits which (if we create art regularly) may help push back many of the mental degenerative effects that commonly come with aging. These include (but by far are not limited to):
  • Creating art delays or negates age-related decline in normal brain function and psychological resilience (i.e. stress resistance). [1]
  • Drawing develops the brain in the cerebellum and medial frontal gyrus (i.e. areas associated with fine motor control). [2]
  • Drawing develops the brain in the precuneus in the parietal lobe (i.e. an area associated with creativity, visuo-spatial imagery, and other tasks). [2]
  • Finally, drawing gives you a happier brain, as drawing releases dopamine. [3]
Sources: [1-Study] [1-Article on the study] [2-Study] [3-Study] [2,3-Article on the studies]

An art therapist watches over a mental health patient during an art therapy workshop in Senegal. Source: VOA, http://www.voanews.com/english/news/africa/Art-Therapy-Helps-Mentally-Ill-Patients-in-Dakar-136400123.htm
Art Therapy session.
So sketching can help you to become a calmer person, more easily able to deal with the stresses of the world. It can help you remember more, and in more detail. It helps you to really take note of what’s around you. And in a more general sense, it can dramatically slow the natural mental decline commonly caused by aging.

Finally, it can be downright fun, as there’s no limit as to what you “have” to sketch. Feel like sketching a peaceful landscape? Cool. Feel like sketching an animal, either real or a new which no one’s seen before? Awesome. Feel like sketching a space-marine decked out in full power-armour, chainsaw-sword at the ready? Go for it. Whatever you decide on, there’s nothing to stop you, and you’ll feel good throughout and at the end of the process for having created something of your own.

So, sketching is fun, it’s highly individual, and you’ll be mentally healthier for doing it. What’s not to love?
Another one of my first sketches, a scarred bay leaf from our garden. Again, it’s certainly not about to win any awards any time soon, but it was fun to sketch, and I look forward to improving.

Something for everyone

Sketching is, quite simply, good for you. And unlike some forms of art, all you need is a sketch pad, and a pencil/pen as an absolute minimum. Both of the above pieces of mine were done, ten minutes at a time, to and from work while I was on the bus with just an A4 sketch pad, HB pencil, sharpener, and eraser. You can absolutely add more pencils, pens, or other tools, to add more shading ability, more depth, more colour, etc. (though I personally am going to get better at the basics before I move on to the more advanced stuff), but that’s also the beauty of it. You can work with everything at your disposal and create something majestic, or use the bare minimum and still create something amazing. Unless you have less than 5 minutes a day free, there’s no reason you can’t take up sketching for yourself.

And it doesn’t matter about your skill level. If you’re worried about what your art looks like, this isn’t school (where you’re graded on your work), and there’s no need for you to have to show anyone. Just make sure you’re enjoying it, regardless of the end result – skill will come in time, with enough practice, just the same as any talent.

All you have to do is get started.

“There is nothing like looking, if you want to find something. You certainly usually find something, if you look, but it is not always quite the something you were after.” ~J.R.R. Tolkien

(Quotes sourced from here: 150 Amazing Quotes to Feed your Creative Soul)

(Originally published, by me, on HubPages.com - 14/03/2015)

Monday, February 1, 2016

d.light S20 Solar Lantern - Two Years In Review


A while ago I decided I needed a solar lantern, or otherwise some kind of solar light. Why? I was doing well in my final year of University, had a relatively-well-paying part-time job (for a Uni student), and this is the kind of stuff I would "treat" myself to.

Something else I bought around the same time was the PowerPlus Spider mini window solar light. This was under $10 AUD at the time I bought it, and ended up being a poor choice. The light output wasn't great, it didn't produce light for more than about 90 minutes, and it died recently (about 2 years after purchase). Perhaps if it hadn't decided to quit on me, it would've found a position in a future home at the end of a hallway, attached to a window which faces the sun, to beam along the hallway when the lights went out... But for now, I'm not rushing to get another one of those.

Back to d.light

d.light is one of the many companies out there selling very affordable solar lighting solutions to be used by those who don't have access to a mains power grid (or have access to a very unreliable power grid), as well as selling their items to people like me (i.e. perfectly well-off people living in first-world countries who also want very affordable solar lighting solutions).

At the time of purchase, three of the main products offered by the company were the S2 (a small solar light for doing homework by, or other such small tasks), the S20, and the S300 (a solar panel and lantern/floodlight solution to light up large rooms or areas, as well as offering mobile phone charging from the battery). For homework and preparing for my job, I used my computer, so there wasn't much need for the S2 in my situation. And there certainly wasn't much need for a solution such as the S300 when I was, at the time, living in big-city suburbia, in a granny flat behind the main household. So, the S20 it was!

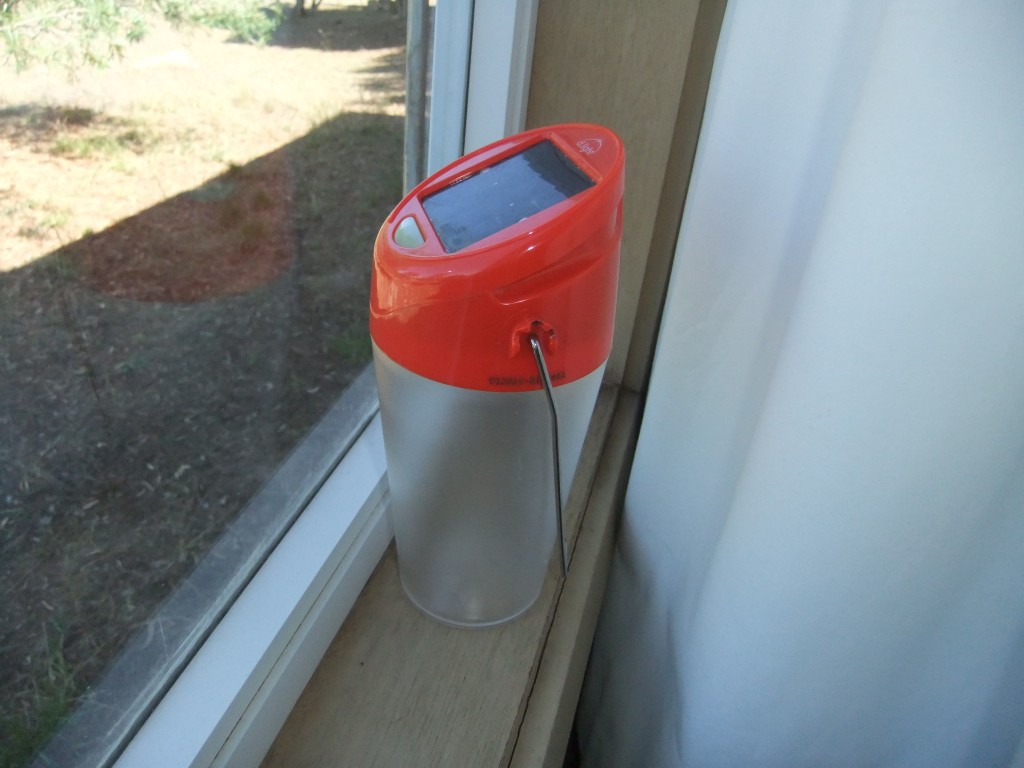
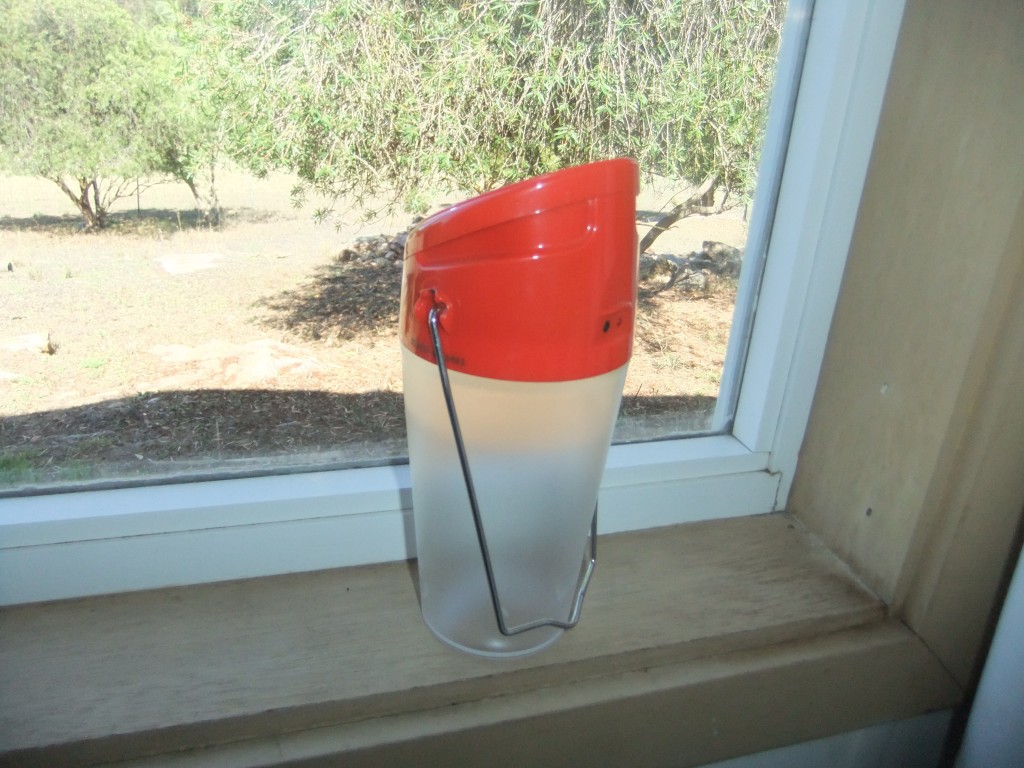
Once I got it, I immediately put it on the window sill to charge. The instructions that came with it told me that it needs up to 8 hours to fully charge, for up to 8 hours of use. One of the best things I remember about the solar panels is that they charge in daylight, not just direct sunlight. So on overcast days, it would still charge, which is great to know.

As for the light itself, it's incredibly simple to use. A small button just below the solar panels turns it from off, to on (low brightness), to on (high brightness), and then back to off. Using the lantern on high reduces the time to discharge the battery from 8 hours to 4 hours, but I haven't yet felt the need to use the high setting. That's not to say that having a high setting won't be useful in future, it's just that the low setting puts out easily enough light for almost any task a lantern is required for.

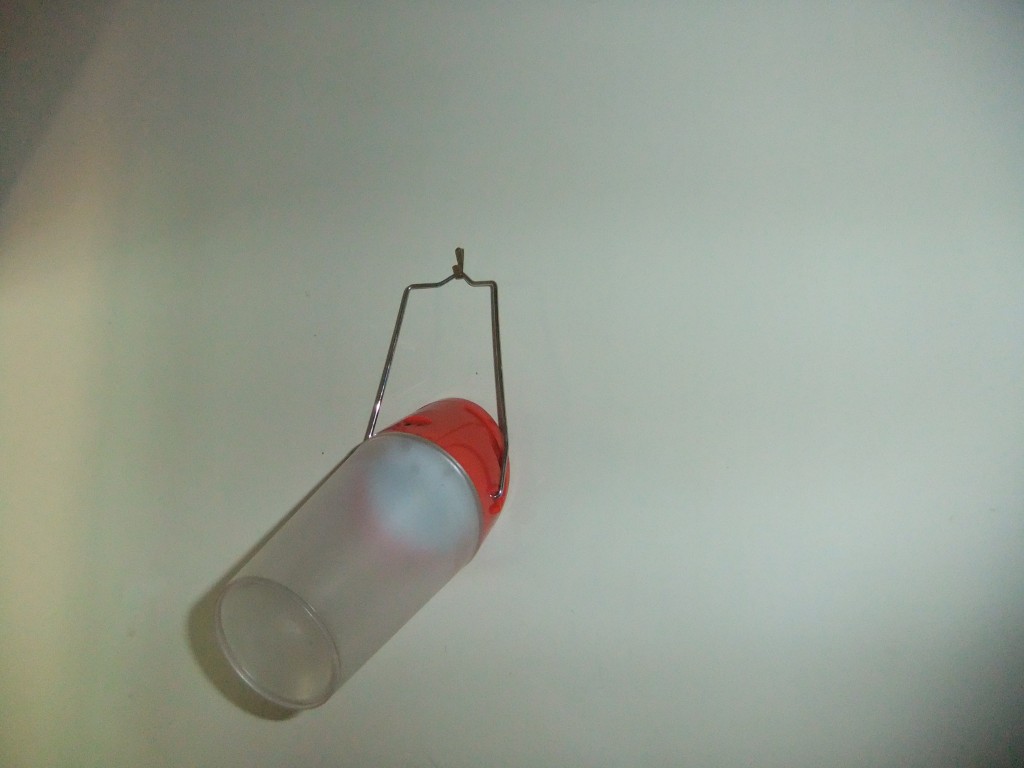
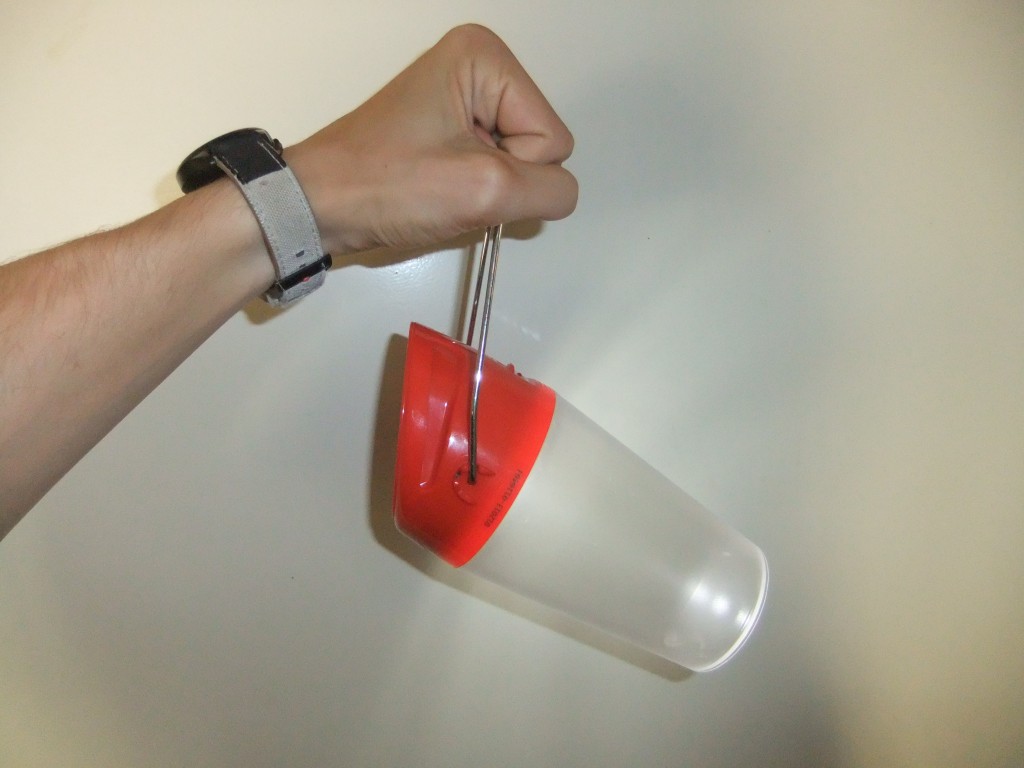
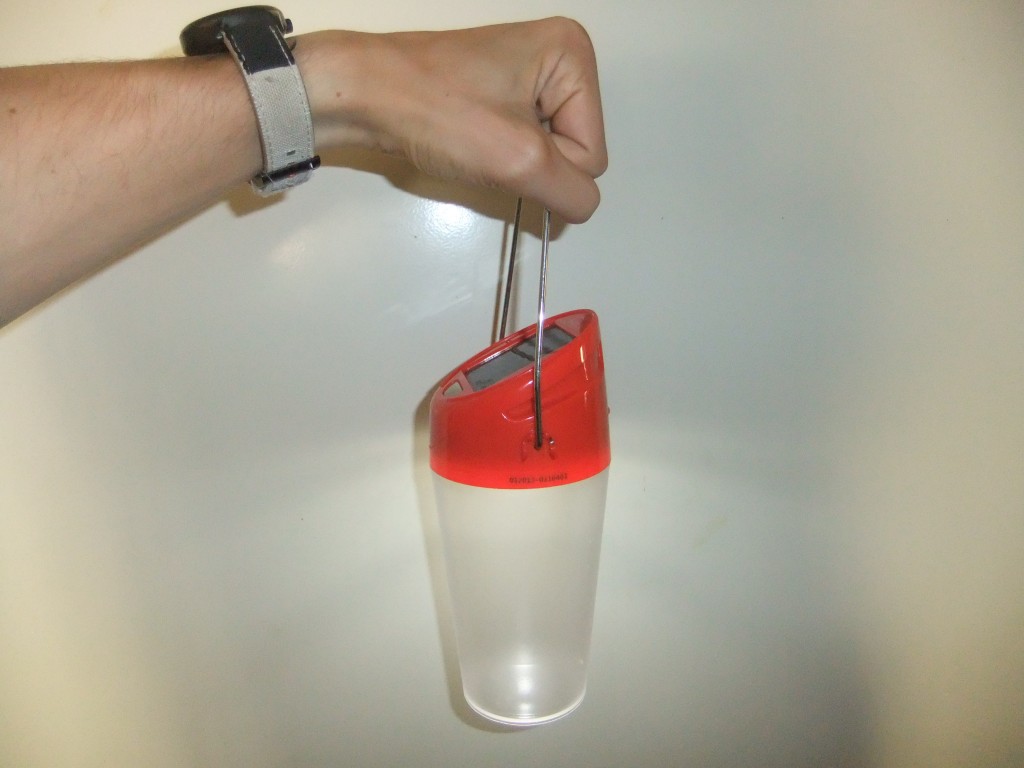
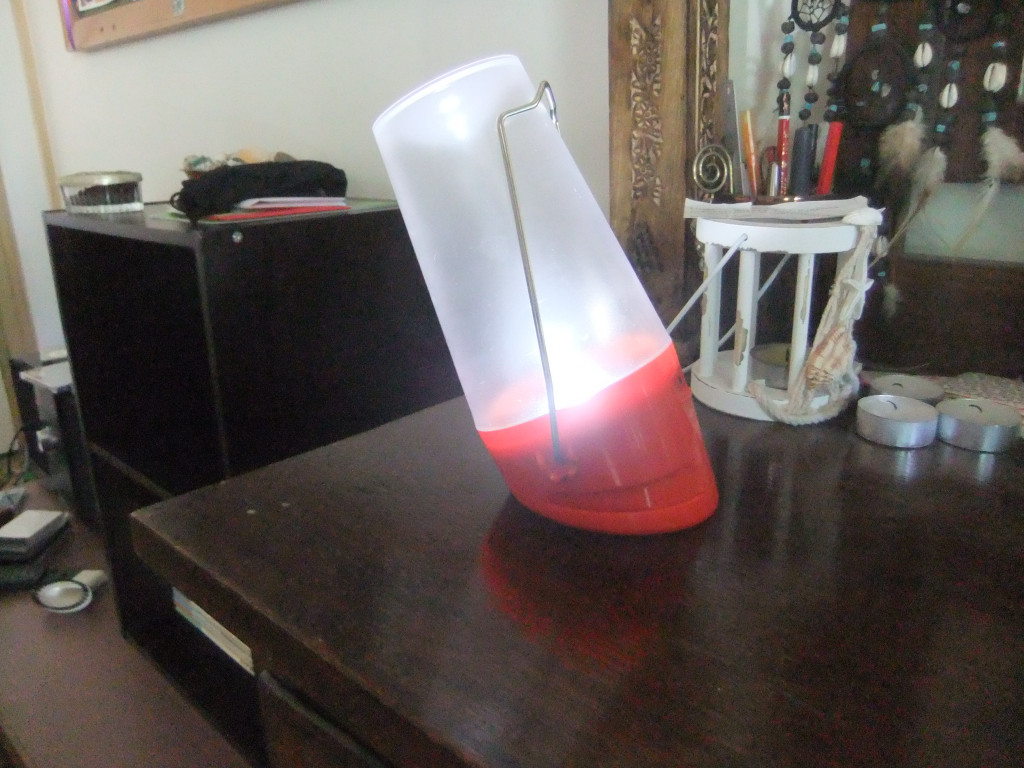
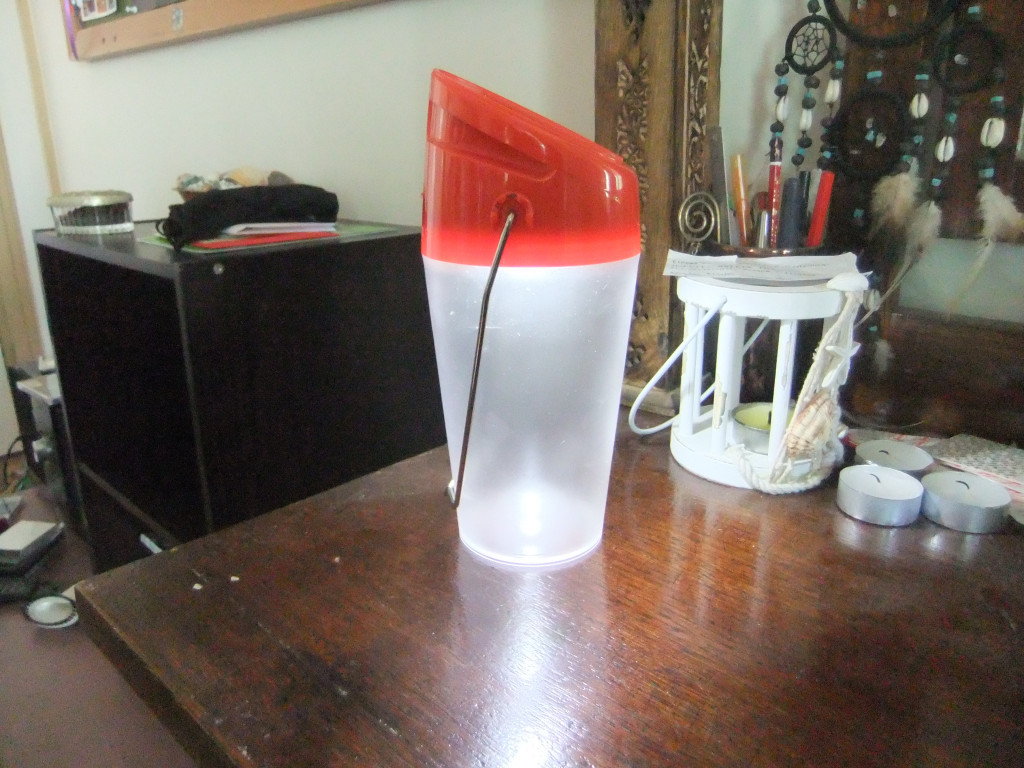
Its metal swivel-handle and slightly oddly shaped head means that this lantern can be held or placed in almost any way, allowing it to be used in most situations.

To test it out in that first year, I had many nights of keeping the house lights off to see how useful it was. I had it hanging off the shower pipe to use in the shower (where it got wet on several occasions), I've used it to make my way around the darkened rooms as well as outside, and I've dropped it (albeit accidentally) on all sorts of materials, including (but not limited to) carpet, wood, tiles, and concrete. Each time I dropped it, the S20 bounced aggressively, but to this day there is still not a crack on it. A few light scratches here and there, sure, but no cracks, and the functionality was not impaired in the slightest.

Since then I've used it in a variety of situations. Most commonly just for going outside at night to get something I had forgotten, or to do something in the garden. But I've also used it, for example, in the first winter at my wife's and my new property, where during the lead up to winter (and during winter itself), I had my pant-belt threaded through the metal handle so that the S20 was hanging off my belt, and as such I had light to chop more wood for our fireplace.

Other Features

The S20 has a small red LED light on the back of its head, which lights up when it's charging in sufficient light. It's a small but (in my opinion) very appreciated touch, as there is no way to know if the solar panel(s) are actually working on a lot of smaller, cheaper solar devices. This way, right out of the box, you can tell if everything is in order by simply placing the S20 in daylight.

It also comes with a small port to be able to charge the device with one of the old Nokia phone chargers. An odd feature perhaps, but remember that not the whole world has been swept along with the smartphone revolution yet, so it makes sense when thought about in this context.

d.light Product Warranty

d.light has a standard warranty on all their solar lighting products, too. So if you buy it from them, or from an otherwise legit supplier, then you get that warranty on your S20.

It's a pretty standard warranty that covers failure from normal use during the first two years after purchase, so assuming you haven't been abusing your product (or have been unlucky enough to be in a flood etc.), there's not much need to worry about wasting money on a faulty product.

The d.light warranty is covered here.

Final Thoughts

So, I've owned one for a little while now, used it in all sorts of circumstances, and I plan to use it for quite some time to come.

There are possibly better solar lighting solutions out there at higher prices. But for its very low price range, reliability, ruggedness, and two-year warranty, this product definitely rates very high for handheld solar lighting in my books.

(d.light S20 website)

Buy S20 on Amazon

(Originally published, by me, on HubPages.com - 18/01/2015)

Tuesday, January 5, 2016

DIY Pallet and Wire Compost


Our very simple yet stable new garden compost areas, made from six old pallets and wire.

Need a place to put compost to use in the garden, but only have minimal materials? If you happen to have access to no-longer-used pallets, here’s a dead-simple guide (with pictures) to create two composting areas for your garden, made from pallets and wire (henceforth referred to as Pallet And Wire Composts, or PAWCs).

Note: This design can very easily be extended to creating more than two PAWCs. I wouldn’t suggest just creating one PAWC, however, as having more than one means you can fill one up, then fill the next one up while you use the compost from the first (now ready) PAWC, and repeat ad infinitum.

Choosing an area

Before we get right on to assembling these PAWCs, we need to choose a good spot. An area which is not too close to the house is a good first point to keep in mind, as many animals (especially various insects and spiders) will love the composting material, and places to hide or set up webs in the pallets. And if they’re close to the house, they might decide to wander over to the structure which always seems so warm and lit up during cold nights…

Next up is proximity to where you want to use the compost. This is not as much of an issue, but in general the less moving stuff around, the better (no point maximising your work for no good reason).

We chose to place our new PAWCs on the top of a slope, above and right next to our various raised garden beds for our vegetables, and near much of the rest of the garden. This way, we have relatively easy access to the compost practically anywhere we decide to use it.

The Ingredients

There’s very little to this recipe for PAWC creation.
  • Six wooden pallets – absolutely don’t need to be new, but retaining at least some of their original structural stability is recommended. Depending on how many you want to create, you will need six pallets for two PAWCs (as in this guide). If you want to create a different number of PAWCs, you will need three and a half pallets for the first PAWC, and two and a half pallets for each additional PAWC.
  • A length of wire – to join the pallets together. The wire should be a minimum width of 1.5mm.
  • Wire cutters.
  • A wood saw.
  • Leather gloves to wear – recommended, especially if you’re worried about accidentally poking yourself with the ends of the wire.
That’s it. Already shaping up to be quite easy, right?

If you don’t have old pallets lying around, try asking your friends, or try asking your local hardware or farming stores. Some sell their pallets off for cheap, and others (like the one we got our pallets from) give them away free.

If you don’t have any of the rest of the required materials (wire cutter, wire, saw), also try asking your friends as a first step. Most people won’t mind lending this kind of stuff. If they do, just invite them around for an afternoon to bring the stuff (to watch over it if they’re that protective), and then share a drink after the project is completed in half an hour.

If you absolutely can’t find any of the items required for free, any good hardware store will sell them for reasonable prices. It’s probably a good idea to have these items if you’re into DIY projects such as this one, anyway.

The Method

One of the six pallets needs to be cut in half, in the same direction as the outside boards. Look through your pallets, and try to find one which doesn’t have a board right along the middle – this pallet will be the one you cut in half. If you don’t have a pallet which isn’t covering up its middle (we didn’t), it’s no issue. Simply choose any of the other pallets, preferably with a gap between the boards as close to the centre as possible.

Cut through the centre pieces of wood to create two halves of the pallet. These halves will be used for the front “doors” of the PAWCs, so that you don’t need to lean over a full-size pallet when the time comes to get the compost out for use.

You should now have five full-sized pallets, and two half-pallets. The next stages can be done by one person, but will be made significantly easier if you have someone else to help you hold the pallets in place.

Creating the first PAWC

Two pallets held upright, forming
the rear-right corner.
Hold a pallet upright with the slats horizontal, such that it will form the right wall. Hold another pallet upright, at a right angle to the first one, so that its edge is touching the rear edge of the first pallet – this will form the rear wall, and together, these are going to form the right-rear corner of the PAWC.


Wire around the two pallet edges.
Beginning at the highest point on the pallets possible, measure out and cut a length of wire such that it can be used to go around the touching edges of the pallets. Pull the wire through the gaps, then twist the wire tightly (at least five half-turns) so that the wire holds the pallets in place.

If there is any extra length of wire sticking out, either cut it off, or bend it back into the pallets.


Wire twisted, to hold the pallets together.


Wire all the way down the pallets.
After wiring the pallets together at the top, at a minimum you should wire the pallets together twice more, for three times total (top, middle, and bottom). If you want to wire the pallets together in more than three places, it can’t hurt.


Three pallets wired together.
The first two pallets are now wired together, forming the right side and the rear. Next up is to add the left side/wall.

Grab one of the other full-sized pallets, line it up with the rear pallet on the left side in the same manner as the right side pallet, and wire it together as per the previous steps.
By the end, you should now have both sides and the rear of the PAWC (made up of three full-sized pallets) completely wired together.


First PAWC completed!
Taking one of the half-pallets, stand it up so that the slats are horizontal, and the side which was not cut through is laying on the ground (i.e. the side which was cut through forms the top edge).

Slide the half-pallet in place, and wire it in on both sides (in three places per side, but two wired connections will probably be sufficient if you don’t have much wire, or simply don’t feel the need for wiring it in three places).

Congratulations! You have just completed your first PAWC.


The second (and any additional) PAWC(s)

The following steps will show you how to create the second PAWC, and can be extended into creating as many of these PAWCs as you like.

Next pallet placed for the rear wall.
Stand another pallet upright, and place it such that it continues the rear wall.


Wiring rear wall in place.
Wire the new pallet in place as per the previous instructions. There will now be two pallets connected to the middle pallet (which was originally the left-most wall on the previous PAWC).


New rear and left wall added.
Add another pallet to the PAWC to form the three main walls of the new PAWC. Wire it in place as per the previous instructions.


Additional PAWC completed!
As with the first PAWC, take one of the half-pallets, stand it up so that the slats are horizontal, and the side which was not cut through is laying on the ground.

Slide the half-pallet in place, and wire it in as per the previous instructions.

Congratulations! You have just completed yet another PAWC.


Possible changes

Given the absolute simplicity of this design, it’s completely up to you for if you want to make these PAWCs as-is, or change them in minor or substantial ways. For example, in future we’re thinking of hammering in some garden stakes to the front of the PAWCs. This is so that, instead of the front half-pallets being held in place by wire, they will be held in place by the stakes pressing them against the other pallets. In this way, the front half-pallets can slide up and out, granting easier access to the compost.

Or, you could take the basic idea of using pallets for compost and put them together in another way. You could join the pallets via hammer and nail, join the front half-pallet up via hinge so it acts as a swinging door, etc.

Something I like about simple designs such as this is their ability to be used as-is for ultimate simplicity, or altered to be as complicated as you like. Yet at the same time, using pallets for compost storage may simply be something you hadn’t thought of yet. So I hope, however you decide to use this PAWC recipe, it helps you in some small way, and you get some amazing compost out of them.

(Originally published, by me, on Hubpages.com - 24/03/2015)